Build a Last Assistant Sensor Guide

One of the big issues with Voice commands in Home Assistant, is out of the box Home Assistant has no context about where you are when you issue a voice command.
But we can solve that with a simple template based sensor.
This guide goes along with the Video on Youtube.
So if you want to see a demo of the sensor in action, and check that out.
Also, this guide was written with the idea that you would be using Home Assistant Voice Assistant, either using Whisper/ESPHome Voice Satellites, or other Home Assistant Voice hardware.
The Secret Sauce - Areas and Labels
For voice commands to be really useful I think its important for Home Assistant to know which room you are in. And to make that happen Home Assistant needs to know where you are the easiest way is to give that context to Home Assistant using the Areas and Labels
If you are new to Areas and Labels, I typically use Areas to denote rooms in my house. Think Living Room, or Theater.
And I use Labels to group like devices. Think Amazon Speakers or room_lights
While that may be the normal way, you can really use them for anything. After all, they are really just there to help you in automate your house.
In this example, I use the area to provide Home Assistant the location of where my voice assistant satellite is so that I can reference the area in my automations. And I use a label to group all of my Voice Assistant Entities together so I can determine the one that was just activated.
The video version of this follows a different path to get to the device you need to modify. But if you didn't watch the video the following might be a easier way.
To set the Area, you can head to SETTINGS > DEVICES AND SERVICES > DEVICES
And then search for your voice hardware. In this case, an M5Stack Atom Echo

Click on the device. Click on the pencil in the upper right. And then you can edit the area. This should be the room in which this device is located. In this case, Slacker Labs Studio.
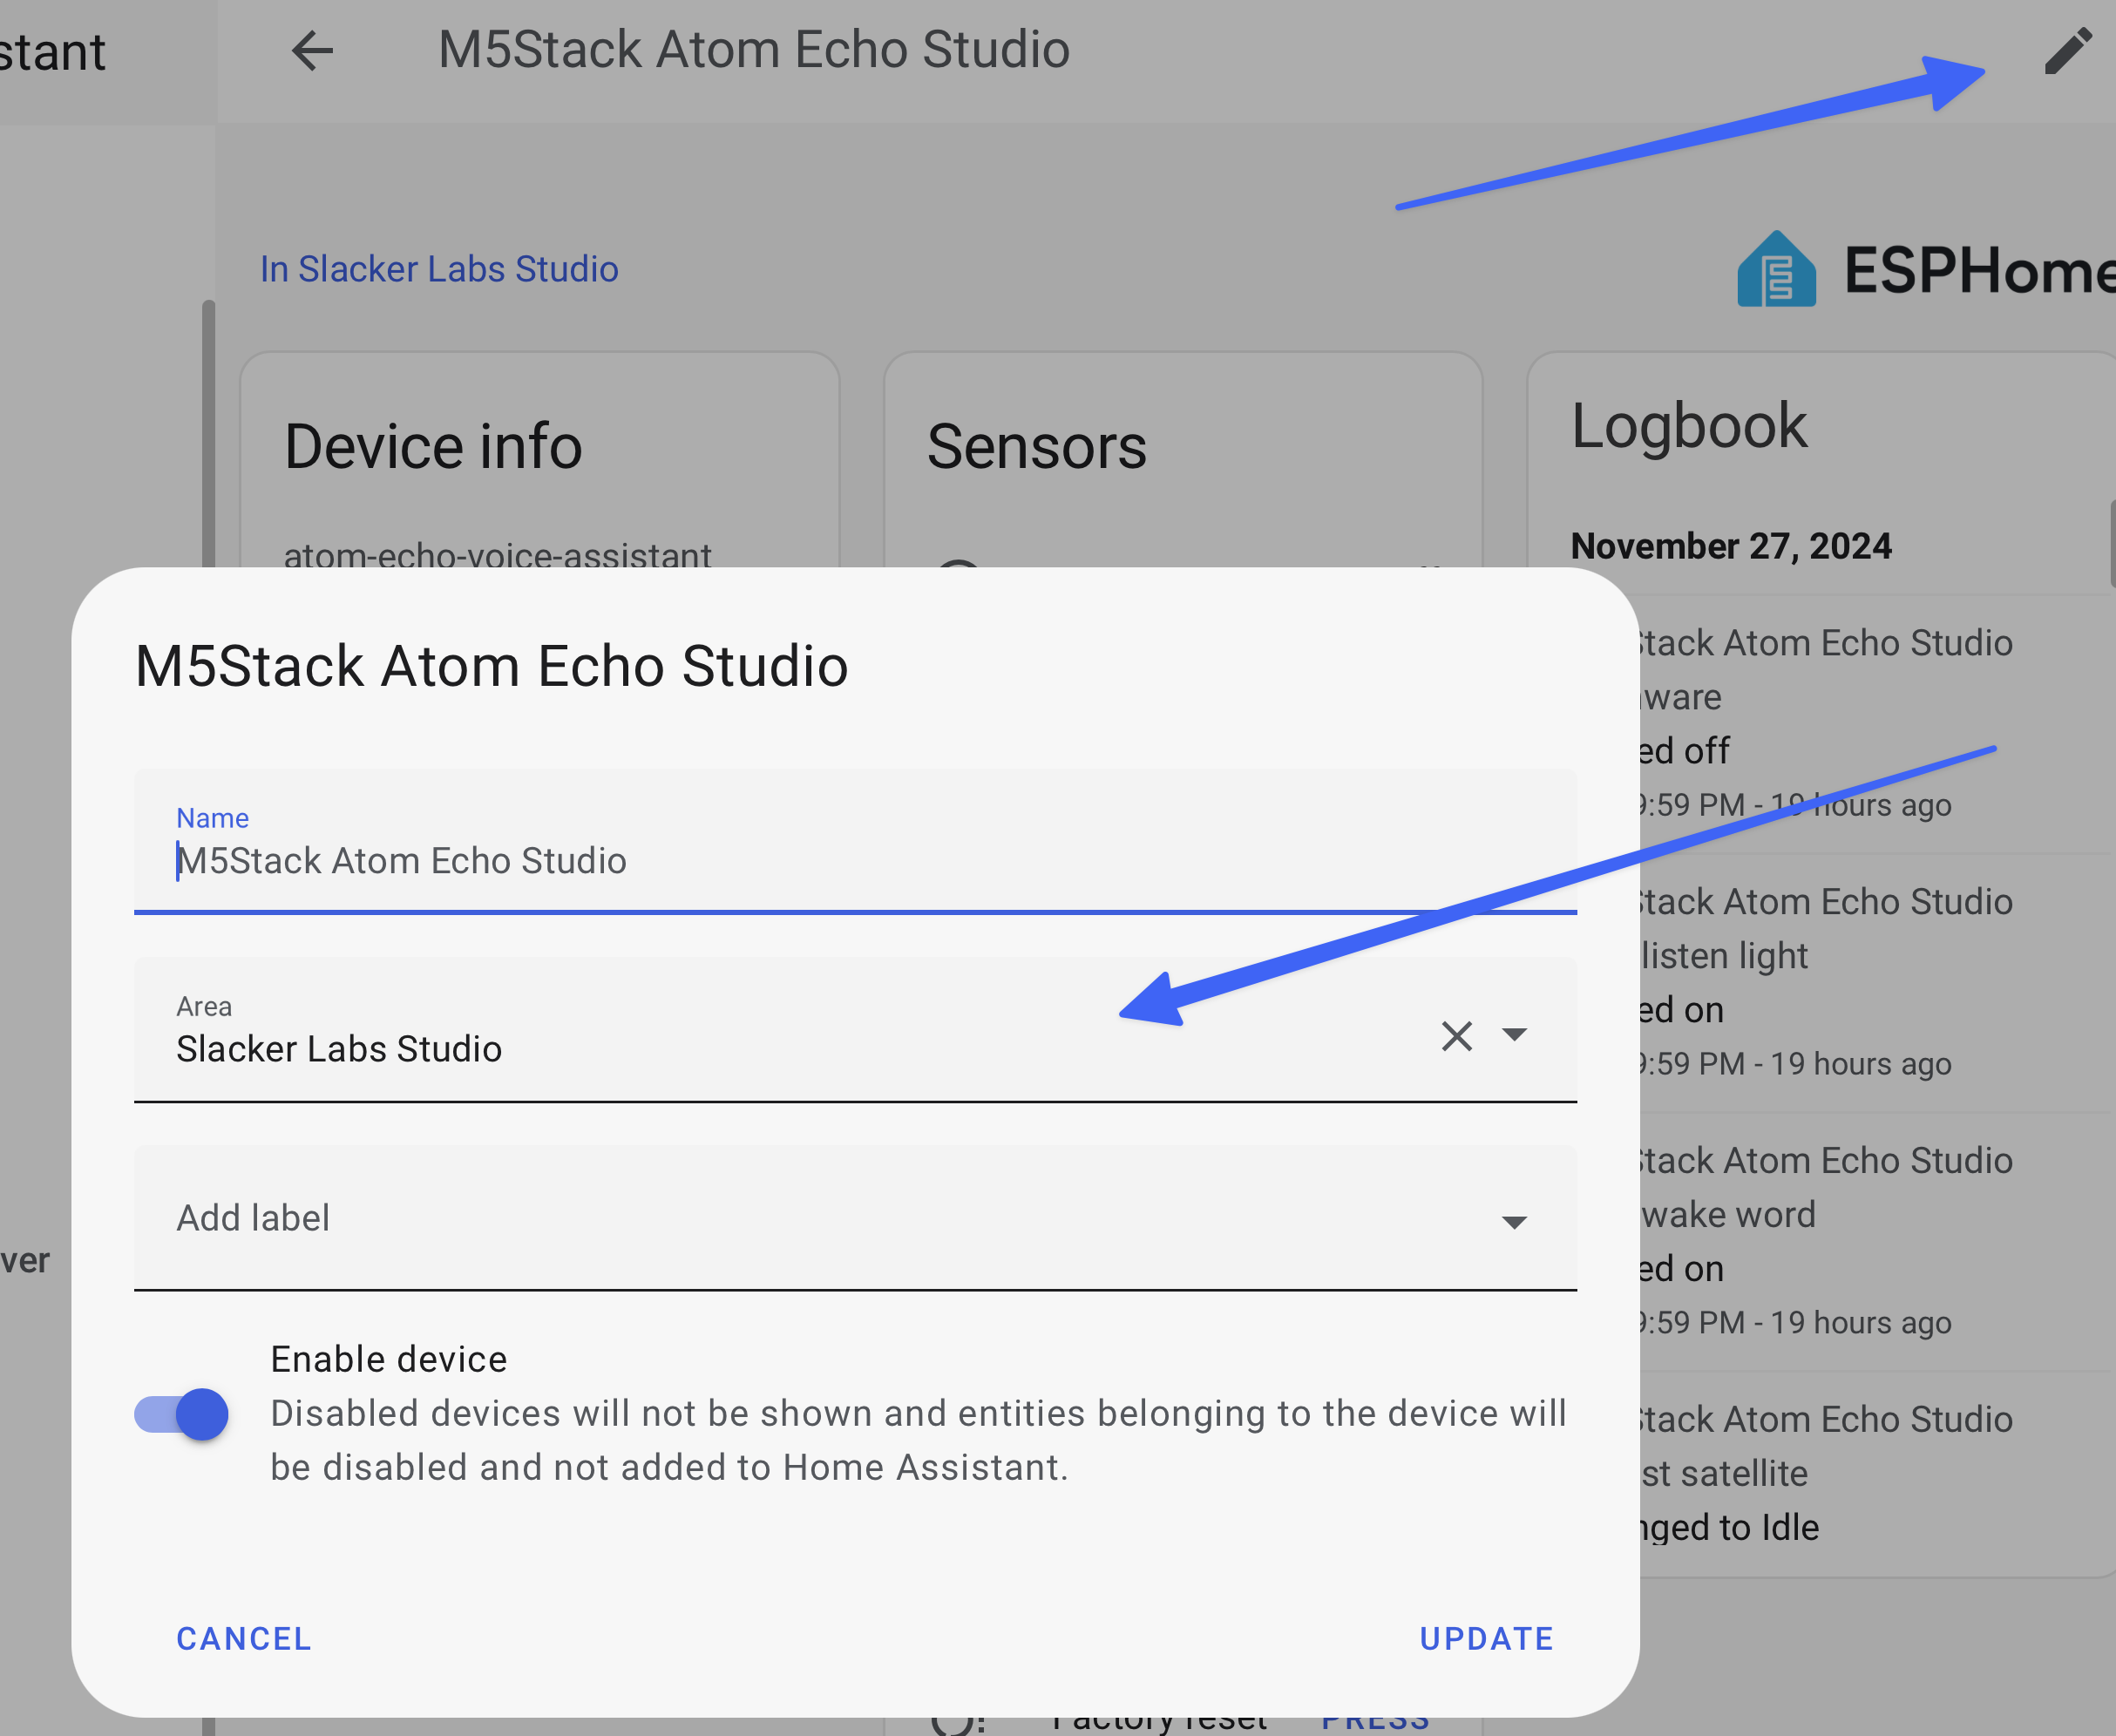
When you click update this will update the area for all the entities linked to this device.
Next you will want to find the Assist in Progress Entity, and click on it.
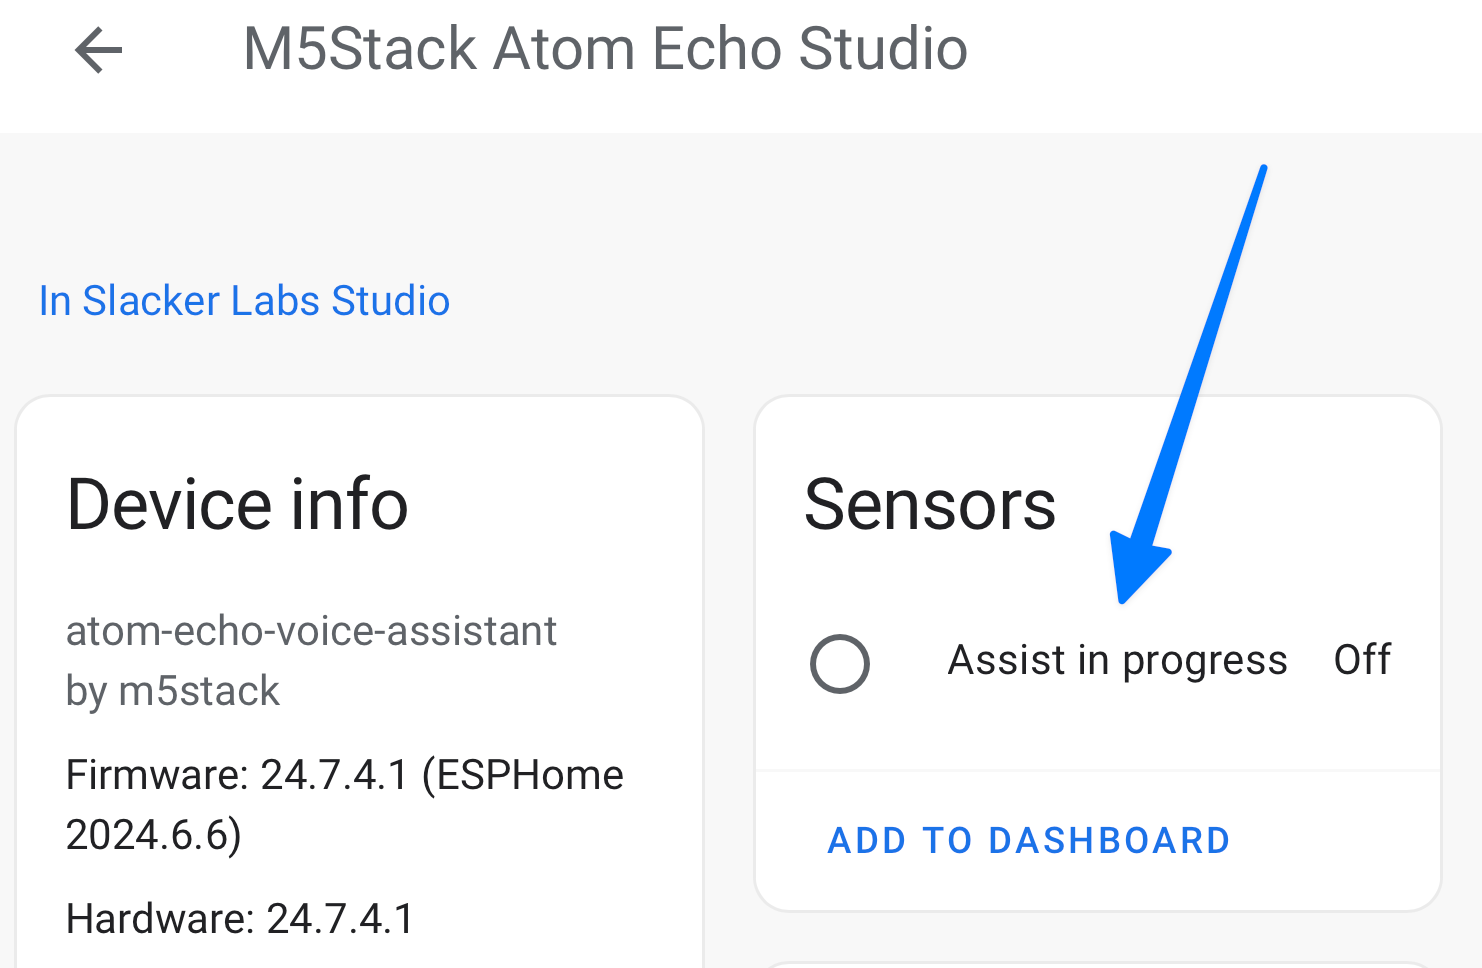
Then in the popup click on the cog.
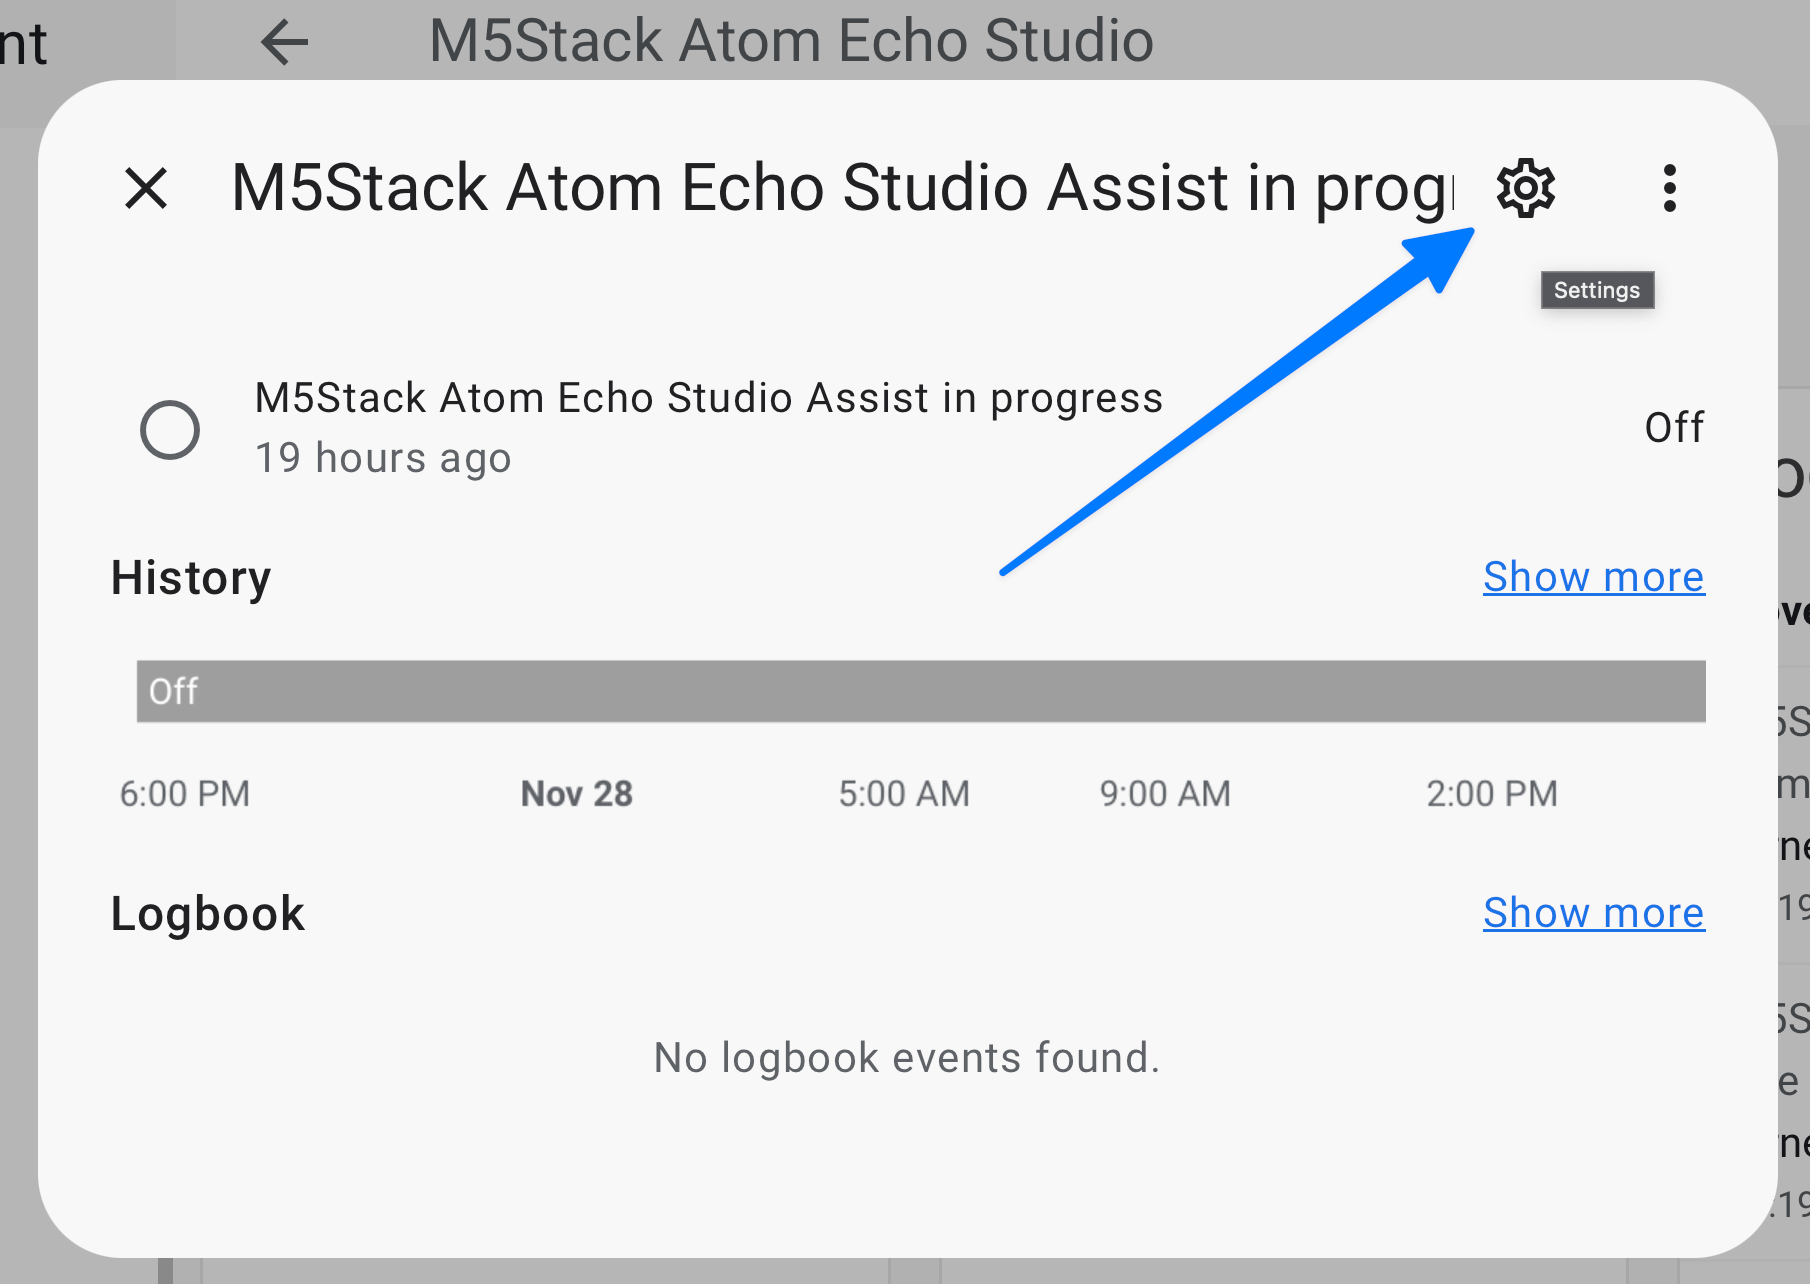
Now you can edit the labels. Here I have already Assigned
Jarvis as a label. You can use any label you want, but you will want to make sure that all your Assist in Progress entities have the same label or this sensor wont work as designed.
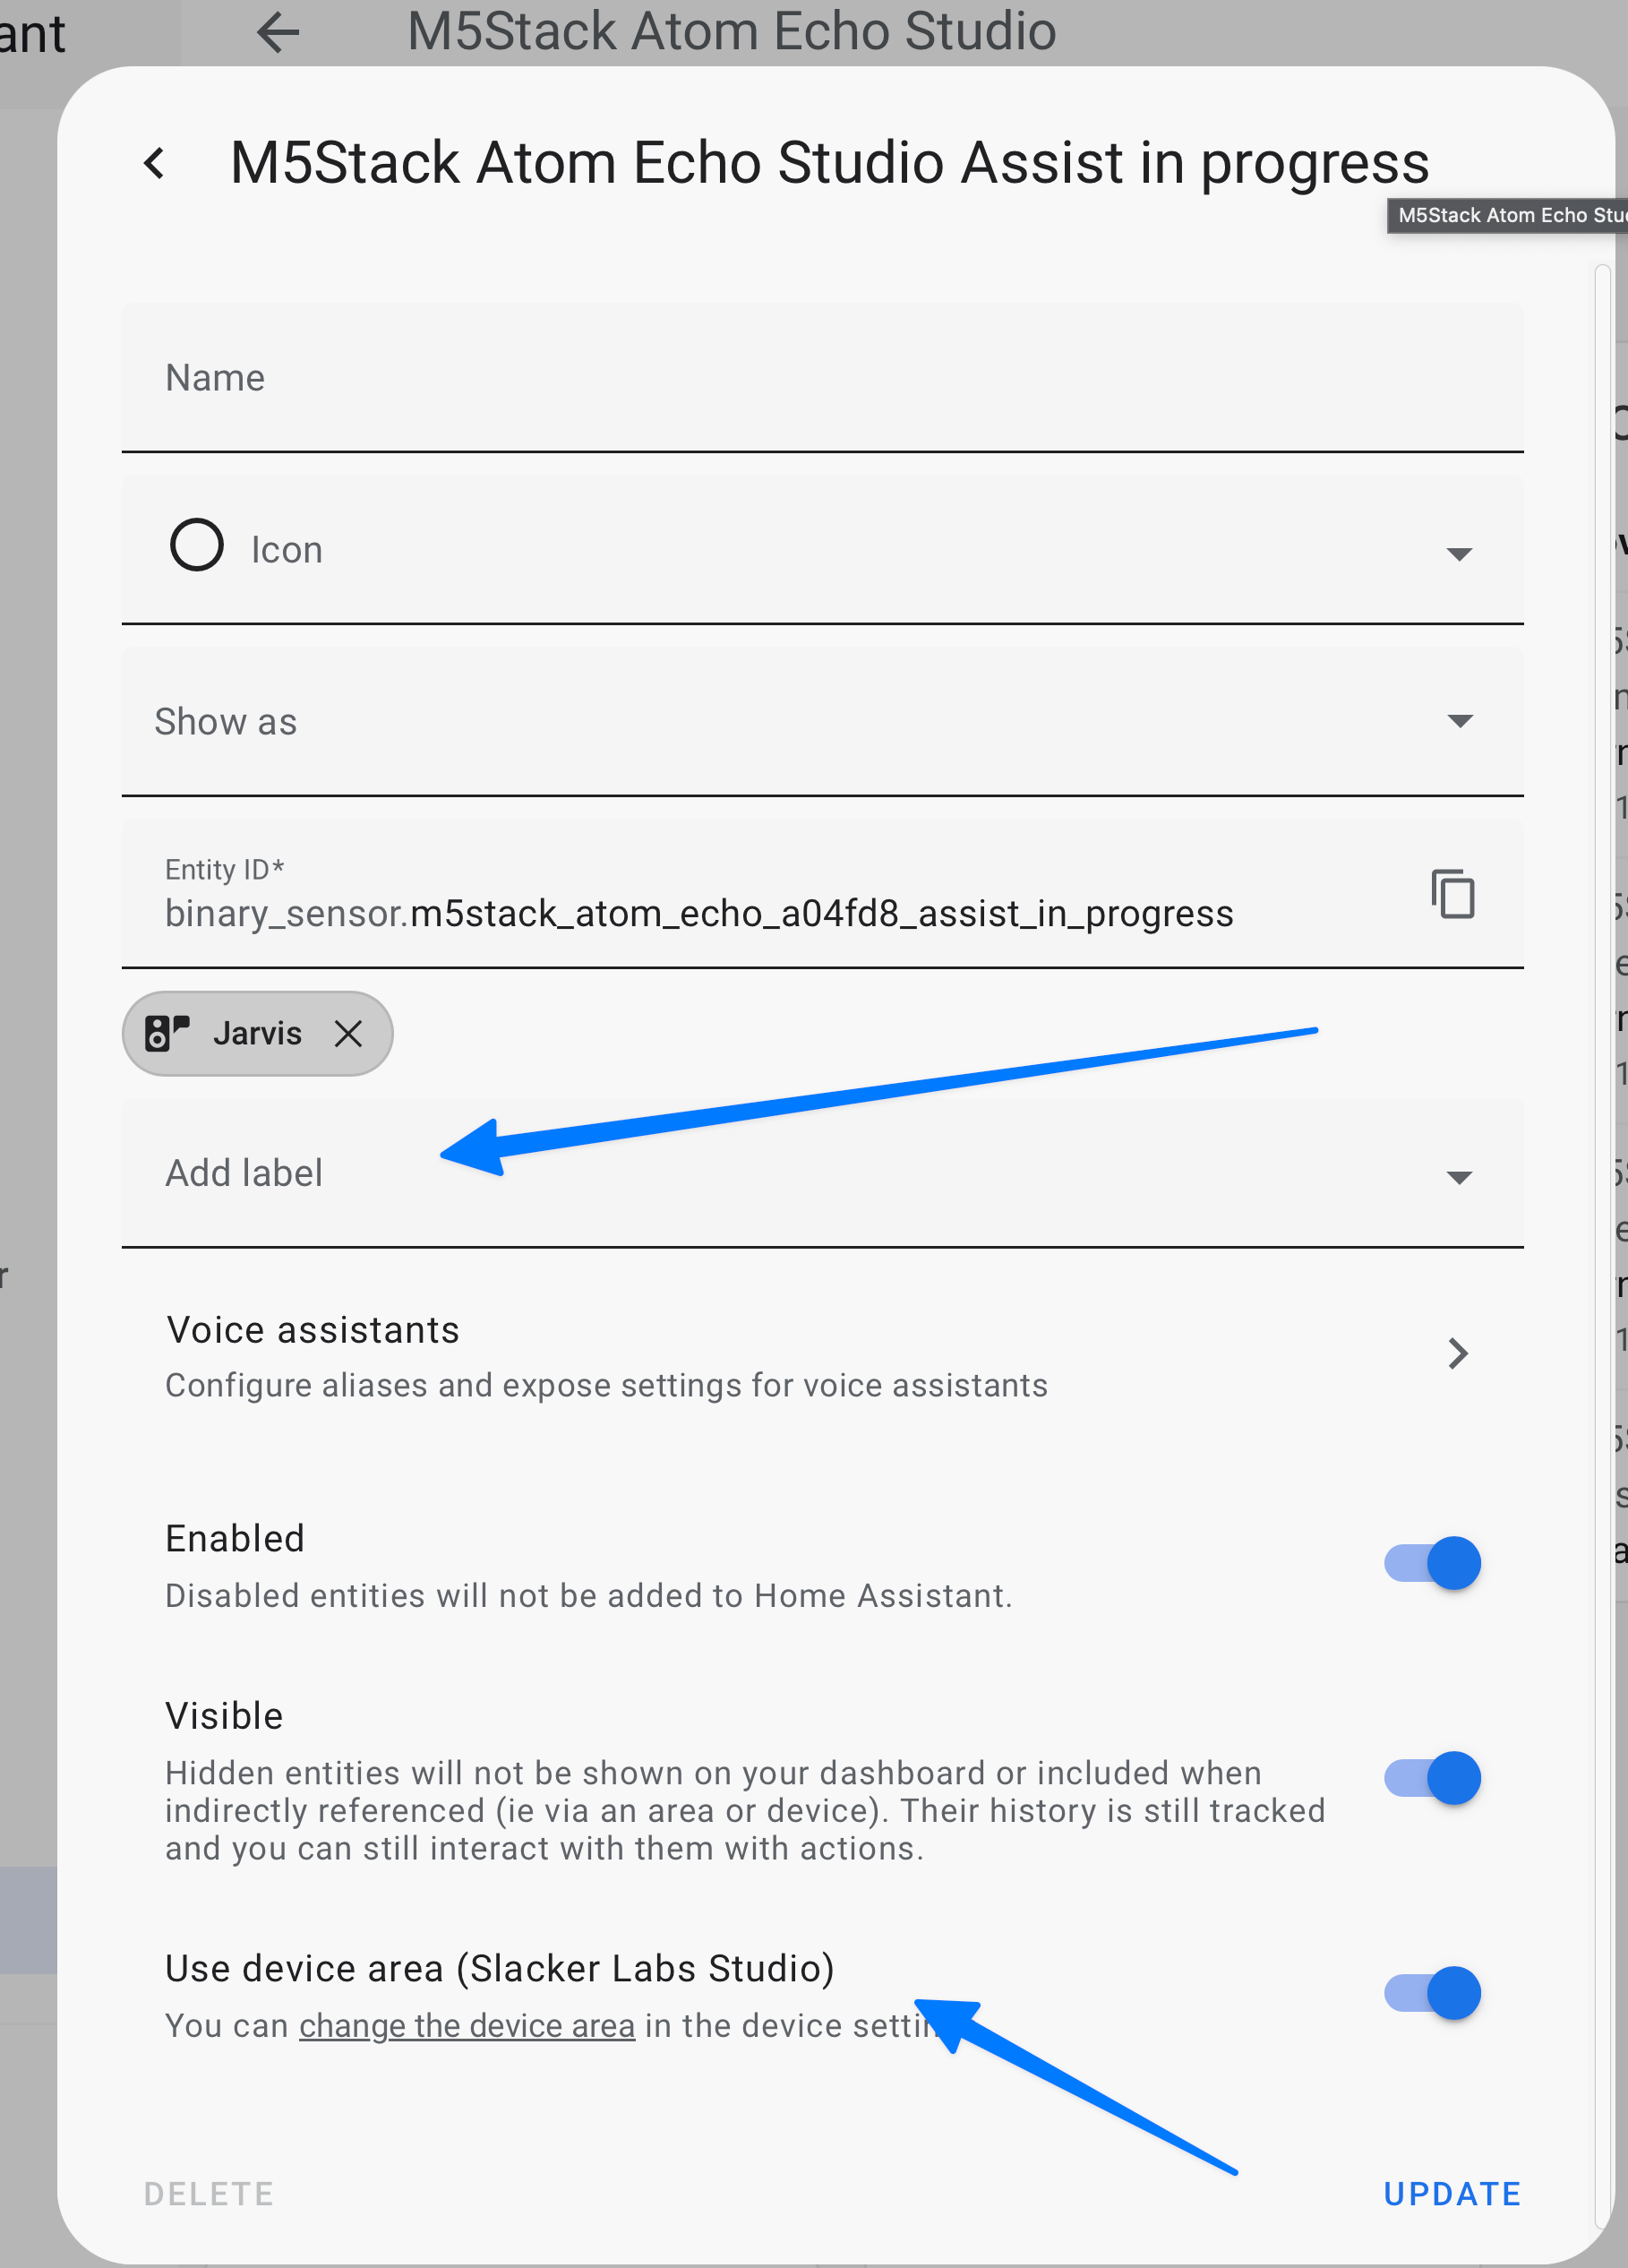
If you didn't change the area using the method above, you can change it at the bottom of this window. BUT it will only change the area for this entity. Which is really only needed for this sensor, but may cause issues in the future if you forget to come back and update the area for the other entities.
Once you have a label assigned you can hit update, and we can create the Template.
The Template
In the video I walk through each part of this template, and explain what it is doing. But you can just copy it from here, and past it in to the Template pane under Developers tools to test it.
This template will return the area_id.
{{ expand(
   label_entities('Jarvis'))
   | sort(attribute='last_changed')
   | map(attribute='entity_id')
   | list
   | last
   | area_id()
}}
Be sure to replace Jarvis with whatever label you choose to use.
You will also want this template which returns the area_name
{{ expand(
   label_entities('Jarvis'))
   | sort(attribute='last_changed')
   | map(attribute='entity_id')
   | list
   | last
   | area_name()
}}
Once you are getting results with the template, you can build the sensor.
Create a Template in the UI
Follow the video, for how to copy and paste the above template to build two sensors.
Create a Template in YAML
Creating this sensor in YAML allows you to build a single sensor, with an attribute makeing it a bit easier to automate with I think.
For those that want to copy and past the template into YAML, here is the sensor.
- name: last_assistant
  unique_id: last_assistant
  state: >
   {{
    expand(label_entities('Jarvis')) |
    sort(attribute='last_changed') |
    map(attribute='entity_id') |
    list |
    last |
    area_name()
   }}
  attributes:
    area_id: >
       {{
        expand(label_entities('Jarvis')) |
        sort(attribute='last_changed') |
        map(attribute='entity_id') |
        list |
        last |
        area_id()
        }}
You will want to past this into your configuration.yaml file under:
template:
 - sensor:
Be sure to indent the - name: two spaces under the - sensor:
For more information see the video linked above.
Use Case - Automation
In the video I show off this capability using the voice command where am I which returns the room I am in.
Pretty useless stuff in the grand scheme, but it does show off this functionality. The easiest way to create a voice command is using an automation. This automation example, does use another template we haven't talked about so grab this YAML and then you can paste it into your Automation UI Editor.
alias: Demo - Where am I
description: ""
triggers:
  - trigger: conversation
    command:
      - do you know where I am
conditions: []
actions:
  - set_conversation_response: " "
  - variables:
      area_id: |
        {{ state_attr('sensor.last_assistant','area_id') }}
      area_name: |
        {{ states('sensor.last_assistant') }}
      media_player: |
        {{ expand(label_entities('Google Speakers')) |
          selectattr('entity_id', 'in', area_entities(area_id)) |
          map(attribute='entity_id') |
        list | first }}
  - action: tts.cloud_say
    metadata: {}
    data:
      cache: true
      language: en-GB
      entity_id: |
        {{media_player}}
      options:
        voice: RyanNeural
      message: |
        You are in the {{ area_name }}
mode: single
Check out the video for more details on this Automation. But this uses our new last assistant sensor to determine the area the voice command was issues in, and then finds a media player to send the response back to in the same room.
Which means that we can now use that to build even smarter automations that would appear as if they were powered by an LLM, when in reality all we did was have to label our voice assistant devices, any speakers we want to use for the responses, and assign all of them in the correct areas.
From there building a an automation that trigger on the voice command get the lights and without saying anything else could turn on or off the lights in the room based on the current state.
And I think that is a perfect example of automating the boring stuff.
