Migrating from Hassbian to Home Assistant (Formally Known as Hassio)

I’m sure you have heard the news by now. Hassbian was sunsetted…sunset..sunsettered…anyway…the last update to the image was back in Q4 of 2019. So that means it was time for me to migrate to Hassio….I mean Home Assistant.
In-between me actually doing this migration and getting this write up published Hassio underwent a rebranding. In order to reduce complexity and confusion, Hassio got rebranded as Home Assistant. So from here on out I will refer to what I installed as Home Assistant. I have tried to update this post to be consistent with that change.
I attempted this migration twice before and always went back to Hassbian. After, finally completing this migration I don’t really understand what scared me off. <spoiler alert> The thing that sent me running back was simply I was used to the Hassbian way. The other, less important, reason was I couldn’t play a local mp3 using a command line tool like vlc out the audio jack. At least not without a lot of effort on my part to understand how to make that work in a dockerized world. Which if you have seen the video on how I added the Disney’s Haunted Mansion to my house that functionality might make sense, and if you have read the article where I explain it the hurdle maybe more so.
Anyway, let’s get to why we are here. Hassbian to Home Assistant.
Ok, first off, this isn’t meant to be a How To exactly, but more of the how I approached this major change. I’m not sure I could write a good How to on the process that would be general enough for the masses. So much of it will depend on your current Hassbian configuration. But what I can share is what went wrong for me and what went right. And perhaps anyone still needing to make the jump will find the missing piece.
Also, i
Second, and this is somewhat obvious, you need to get Home Assistant on to your device of choice. I’m not going to cover this in detail because frankly there is some awesome content on youtube already that does just that. For example, https://www.juanmtech.com/guide-to-home-assistant/ and https://www.youtube.com/watch?v=XWPluWcYRMI
What I did was just followed the Home Assistant docs, flashed an SD card with the Home Assistantimage, and booted up my raspberry pi.
Then I waited. Seriously. This first boot will feel like it takes forever. The reality is it’s only a flash of time compared to how much you are about to spend geeking out over this stuff. Have a coke and smile, and wait for the install magic to be done.
Once Home Assistant was up and running the plan was to just drop my configuration on there and figure out the issues as I went. Run and gun style. So I actually tried that.
It was a horrible plan. The worse. I’ll save you some time. Don’t do that.
So I started over with the idea that I would rebuild my configuration as I went. At least that way, I could clean up the any craziness left over from months of tinkering. So bonus!
My new approach after first boot went like this:
- Install Home Assistant Add-ons
- Setup Integrations
- Setup Devices
- Migrate Scripts / Automations / Packages
Installing Home Assistant Addons
After you get Home Assistant up and running, you will want to sign into Nabu Casa.
I know that might be an issue with people, but I like how easy it is to integrate with Amazon and Google. And if you are planning on connecting those services you will too. It’s $5 a month and supports a great project.
Then I added some Home Assistant add-ons via the Supervisor Panel. By the way, this Add-on store is awesome.
Just click Add-on Store and search away.
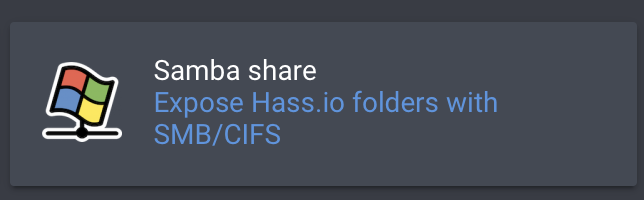
The first one I grabbed was Samba which made it easy to get my configuration files on the device.
Installing it is easy. Just click the Install button. Don’t worry about starting it until you have it configured.
For Samba the configuration is pretty straightforward. Just following the How to Use steps and you should end up with a configuration that looks like:
workgroup: WORKGROUP
username: hassio
password: somethingwitty
interface: ''
allow_hosts:
  - 192.168.7.0/16
Once you get the config set, click Start at the top and make sure “start on boot” is on.
After that I installed MQTT.
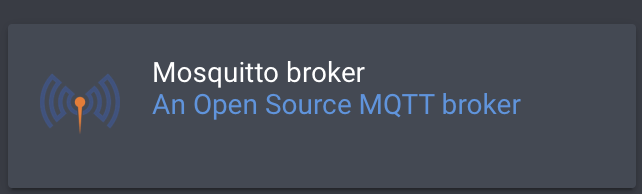
I’m a huge MQTT fan. I actually have my network speediest, and some other sensors running on another host and passing values to my MQTT topics. This allowed me to move some of the less system critical stuff off the home assistant host. MQTT makes it easy.
Just follow the documentation. It is really good. Are you detecting a theme? The only thing that might trip you up is if you are going to have a client from outside of Home Assistant, like another server or host sending data to your MQTT broker pay attention the section under “Add the following configuration to enable unrestricted access to all topics.” It took me a little bit to figure out that is what I was missing.
Setup Integrations
Then I moved on to setting up my other integrations. You may have an urge just replace your Home Assistant configuration.yaml with your old one. Resist the urge. Take a more manual approach.
I was able to copy a lot of my integrations out of the old Hassbian configuration.yaml and paste them into the new Home Assistant configuration.yaml.
These included:
wemo:
  discovery: true
  static:
  - 192.168.7.99

google:
  client_id: !secret google_client_id
  client_secret: !secret google_client_secret

life360:
  accounts:
    - username: !secret life360_username
      password: !secret life360_password

cobee:
  api_key: !secret ecobee_api

plink:
  discovery: true
Then I rebooted and made sure all of them came up as expected. Any I could add via the Integrations page in the configuration menu I did as well.
I also decided to move over my other configurations that weren’t linked to external devices. These included my zone, input select, input boolean, and input datetime configs. For these I just copied the old file into the new config folder for Home Assistant and added the pointers to the configuration.yaml
input_select: !include input_select.yaml
input_boolean: !include input_boolean.yaml
input_datetime: !include input_datetime.yaml
zone: !include zones.yaml
Devices
Devices became a major chore, and I suspect they might for you unless you have them abstracted out of Home Assistant in Smartthings or another hub that is connected via an integration. I had been using Smartthings as a dumb device hub for my entire time on Hassbian. Which works really good if you want an easy way to integrate Wave and Zigbee devices. But I had been wanting to get off Smartthings for some time and get these devices into Home Assistant directly to reduce my reliance on other cloud providers for critical things like door sensors. I took this migration as an opportunity to do that. I leveraged the zigbee2mqtt and zwave2mqtt add ons in the add-on store.

I had already built my zigbee usb controller using the guide on the zigbee2mqtt project and even tried to get it added to Hassbian, but ran into issues and ultimately gave up. But the add-on in Home Assistant worked out of the box. So I removed my zigbee devices out of smart things and re-added them to Home assistant. The Zigbee devices added without any trouble. The most difficulty part was the names.
I had also tried using usb Aeon zwave controller in hassbian and found it buggy. But just like zigbee2mqtt the zwave2mqtt add-on worked out of the box. Just had to point it to my device path. I should have taken better notes on this part, so I could have given you a step-by-step guide. But alas, I ddin’t. So if you run into issues hit me on on twitter or leave a comment below and I will help you though it.
After getting the usb stick connected to Home Assistant I went through and added my zwave my devices. The one thing I found in setting up there zwave2mqtt add-on was I had to enabled “assume awake” on the battery powered devices to ensure that they reported correctly that they were sleeping instead of dead.
I remember the hardest part was removing the device in Smartthings and re-adding it to Home Assistant Directly, so hopefully if you go this route it wont be so bad. Unfortunately I cannot speak to migrating these two devices from Hassbian to Home Assistant, but I hope there is a path to backup the configurations on Hassbian and just re-import the backup
The one issue I had was I couldn’t get the zwave devices to auto discover via MQTT no matter how much I tried, so I gave up. Fortunately I had been using the Smartthings to MQTT bridge in Hassbian so I just leveraged the MQTT lights and switches I had configured in Hassbian. I just created a lights.yaml and a switches.yaml in my Home Assistant config folder, and then I copied over the device configs to the appropriate file, updated the MQTT topics with the new topics, and then pointed my configuration.yaml to the files.
light: !include lights.yaml
switch: !include switches.yaml
binary_sensor: !include_dir_merge_list binary_sensors
Once that was done it was time for another reboot to check my work.
Migrate Scripts / Automations / Packages
Once I was satisfied with that all that was left was the migrating the Script, Automations, Packages, Sensors and Scenes. For me this took almost as long as migrating the devices. I went through each file and had to update the device names since in many cases the names had changed.
But I copied one file over, went through and updated device names, added the pointer to the configuration.yaml ,and rebooted to make sure I as good. Just take your time and double check everything. And be prepared for some weirdness this first couple of weeks.
Final Thoughts
In all it took me about 6-7 hours after the second start to get it done. I started once the kid was asleep around 7pm, and the only thing I couldn’t finish during the night was re-adding some of the devices like smoke detectors that make a lot of noise when adding them to a hub.
For the most part you will be able to copy large parts of your config over to the new config files without any modifications. It’s the very small part that you can’t that will lead down the path of cryptic error messages which at one in the morning is no fun.
And this process is not as bad as it seems. I dreaded the move. Ran from it back to the arms of Hassbian actually as I already stated. But in the end I struggled to see what had spooked me. And now that I have been on Home Assistant for 4 months at least I can tell you it is absolutely a better experience.
Just grab an SD card and do it. And if you have questions hit me @thejeffreystone on twitter or leave a comment, or shoot any of the other Home Assistant-ers a question. We might not know the the answer but we can help you find it.
Until next time…Go Automate Something.