Swapping out DuckDNS For Cloudflare

This is a repost of an article I posted on Medium. I have given it a slight edit to update it with my current config and published it here as part of my efforts to consolidate my Home Assistant content
A while back I decided to simplify my Home Assistant config and in doing so I decided to move off my duckdns domain to Cloudflare. There were three big reasons this sounded like a good idea:
- Stop relying on scripts to auto renew my Let’s Encrypt cert
- I had a domain sitting around I wasn’t using.
- Cloudflare’s services were free including a 15 year ssl cert.
But after deciding to see what I needed to do I saw that Home Assistant had a Cloudflare component and that other Home Assistant-ers ( do we have a name? ) were already doing this so, off I went.
And the process was super simple. I use Hassio for my install so if you are using a different setup your process may be a bit different, although the only different is where you store your pem files.
Before we jump in, this guide assumes you have already been using DuckDNS and/ or perhaps another domain with an SSL cert or at least have it already setup. Because of that it doesn’t cover things like how to setup your Home Assistant instance with SSL. If you want to good guide on the getting started with SSL check out https://www.youtube.com/watch?v=BIvQ8x_iTNE or https://www.juanmtech.com/guide-to-home-assistant/ .
As far my setup. I have the domain I am using for Home Assistant pointed to my home router’s public ip. Then I have port 443 forwarded to port 8123 on my Home Assistant instance. I do not have port 8123 forwarded. So the only way to hit my Home Assistant instance from outside the network is via https or port 443. Internally I can got to https://internal_ip:8123 and after bypassing my browsers complaints about the SSL cert can still login. Now, on to why we are here.
First, and probably the longest was moving my domain’s DNS from the current provider to Cloudflare.
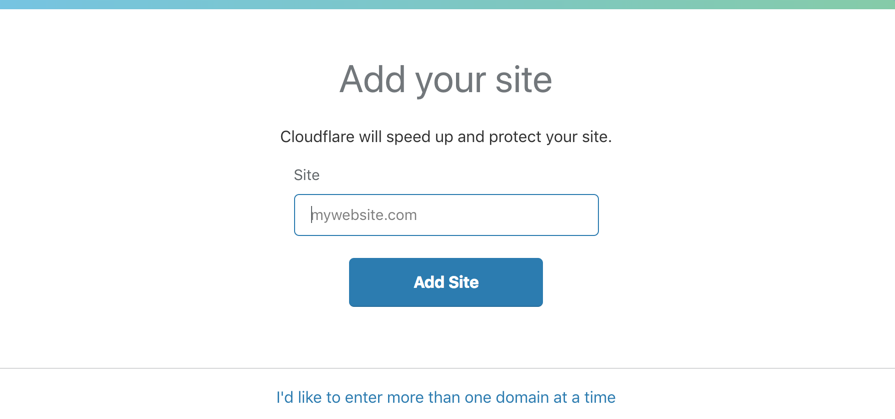
I went to www.cloudflare.com/ssl/ and signed up for an account.
After that I added my website using the domain I already owned. If you need a domain I suggest Hover. They include privacy which most do not.
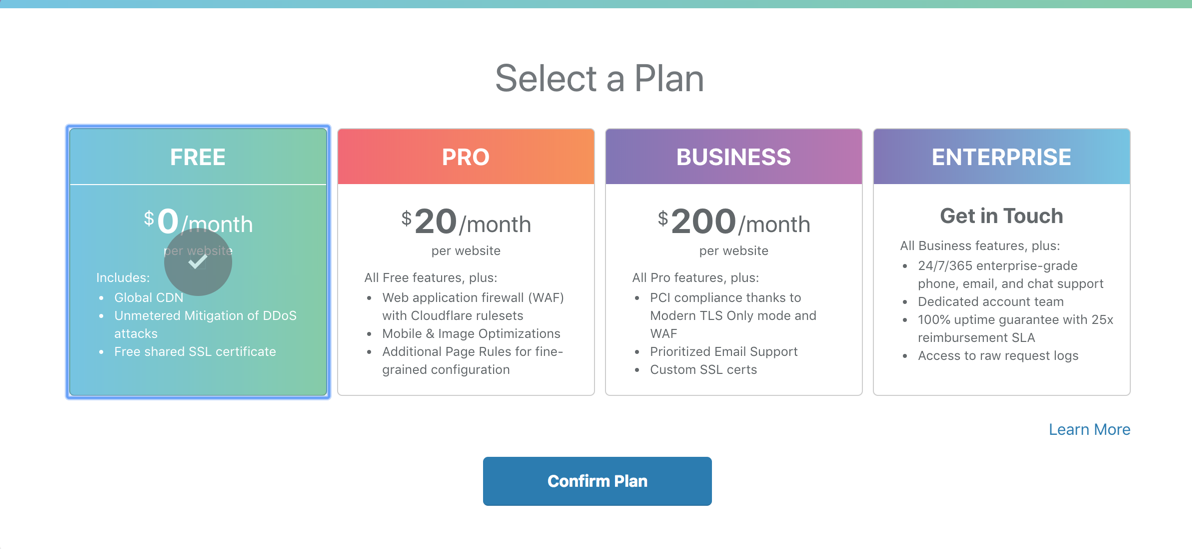
The next thing you have to do is pick a plan. The free works for this and includes everything you need to get your ssl setup.
Once you confirm your plan, Cloudflare will query your DNS records. From there you will be provided with the Cloudflare name servers that you will need to take to your domain registrar and update unless you transferred your domain to Cloudflare. In my case I just left the domain at the current registrar.
Just log into your domain registrar and din where you edit the name servers. Replace what is there with Cloudflare’s name servers.
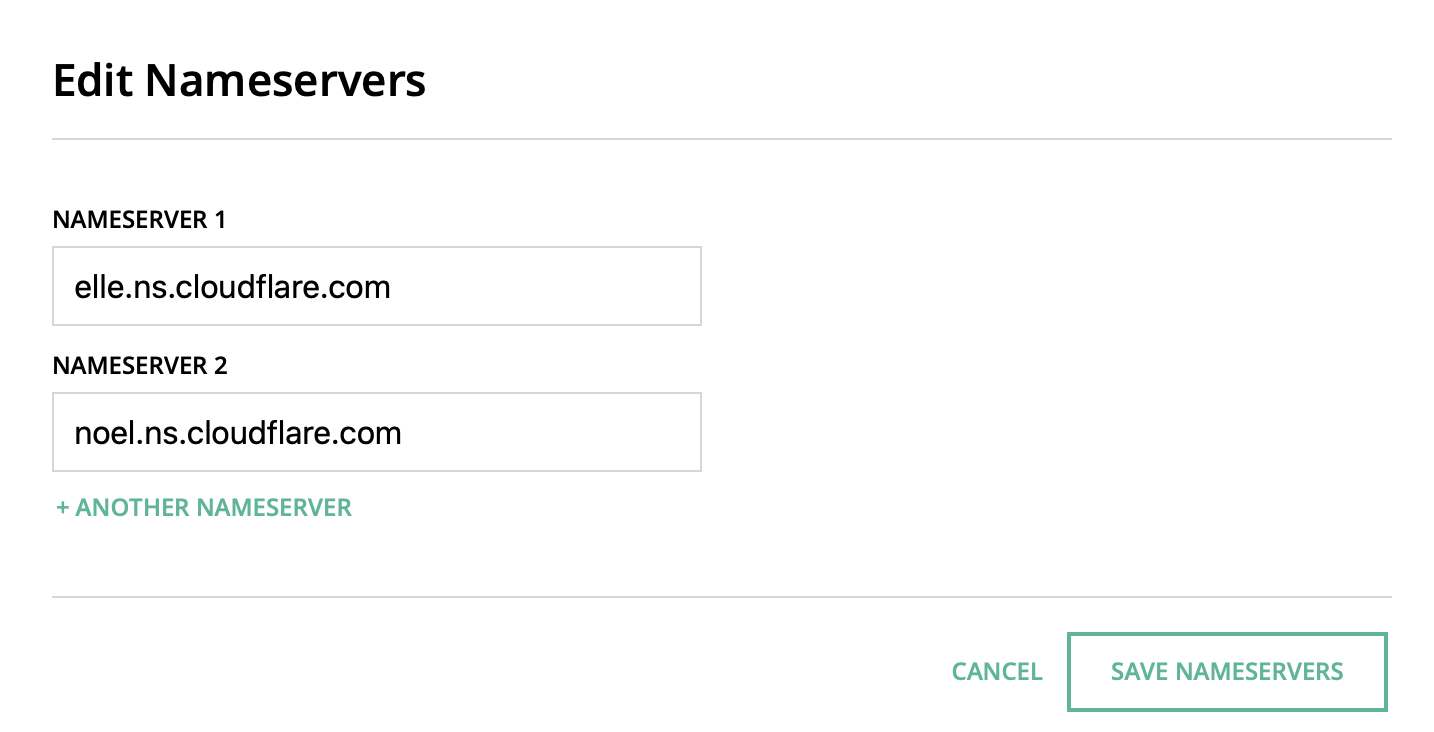
Your registrar may look different, but if you are planning on doing this I have to believe you can find your way through the Cloudflare service and updating your domain. It was super easy, and the path is well documented.
After pointing the domain to the Cloudflare name servers it is time to update Cloudflare’s DNS Records. Go to the Cloud flare’s DNS page if you are not already there:
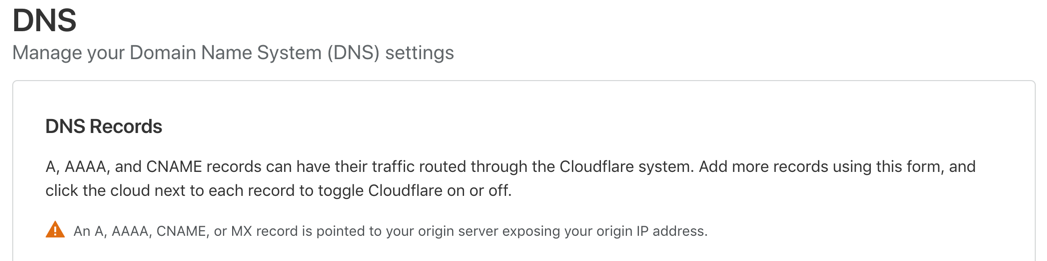
You will want to update the IP address to point to your public IP home your Home Assistant. This does need to be an IP Address and not another domain name. So I do not think you can who the Nuba Casa instance of your Home Assistant. But let’s face it. If you are just leveraging Nuba Casa for your public hosting then your SSL is already taken care of.
I actually added a subdomain to my domain, ha.mywebsite.com. So in my case I added an “A” record name “ha”, and pointed it to my public IP leaving the other records as is. For clarification, I used 127.0.01 in the image below as an example, like I said this needs to be your public IP of the server hosting Home Assistant.

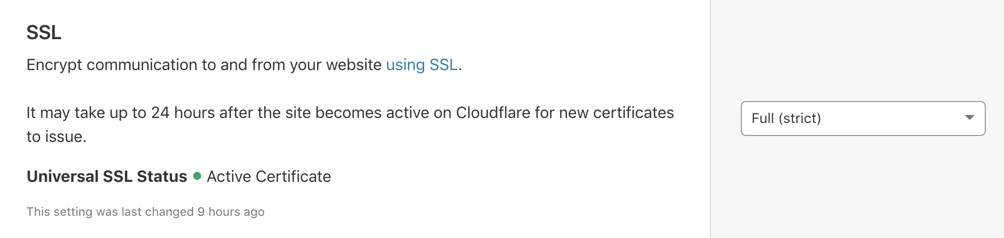
After that, it’s time to grab your cert. Click on Crypto at the top of the page.

I changed the option to Full Strict. I’ll leave it up to you dear reader to decide which option is best for you.
Then scrolled down to the Origin Certificate Installation and clicked “Create” and fill out the form. The list of hostnames needs to include your domain and subdomain. So since I am planning on using http://ha.mywebsite.com as the url for my Home Assistant I entered
ha.mywebsite.com
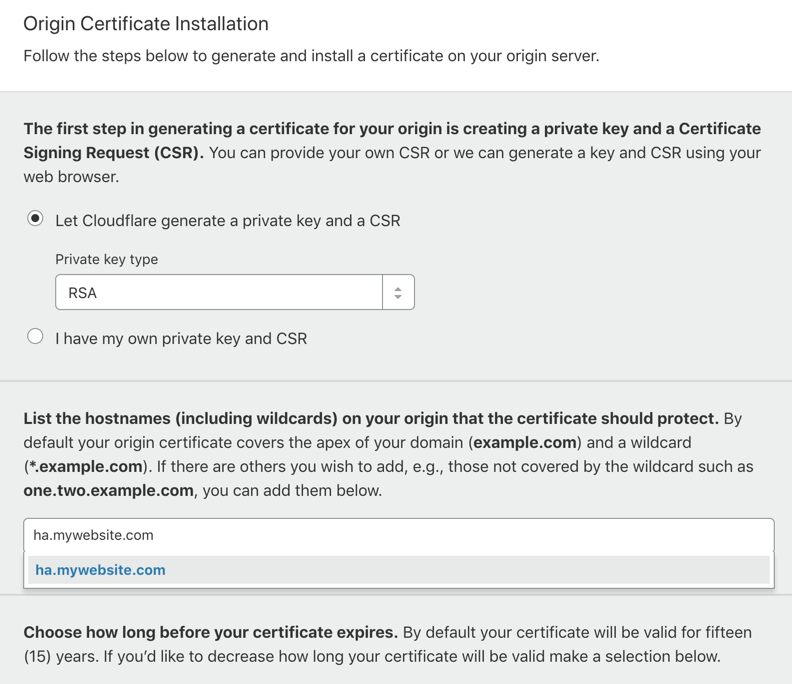
When you complete this setup you will be shown the certs. You will need to copy and paste them into files you create on your Home Assistant.
I copied the pem to a file named ha.mywebsite.pem and the key contents to a file named ha.mywebsite.key on my computer. Then I copied them to the ssl folder on my Hassio install via samba.
When I was done I had two files located at:
/ssl/ha.mywebsite.pem
/ssl/ha.mywebsite.key
After that I suggest you wait a few hours for the change to propagate. During this time you can setup your secrets file with your new info.
If you are not publishing your config online at github or if you gave your file a name that doesn’t give away your domain name or if you like to challenge fate you can skip this step:
In your secrets.yaml add new lines for your new files and base url:
cf_ssl_cert: /ssl/ha.mywebsite.pem
cf_ssl_key: /ssl/ha.mywebsite.key
cf_base_url: ha.mywebsite.com
Now, once you are ready to cutover to the new domain it’s time to update your configuration.yaml.
Protip: I suggest just commenting out the existing config until you have tested. That makes it easy to rollback.
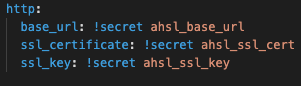
Add the following under your `http:` section and replace the names of your secrets with what you setup in the previous step.
  ssl_certificate: !secret cf_ssl_cert
  ssl_key: !secret cf_ssl_key
  base_url: !secret cf_base_url
If you skip the secret file then you can add the path to the files directly in the configuration file like:
  ssl_certificate: /ssl/ha.mywebsite.pem
  ssl_key: /ssl/ha.mywebsite.key
  base_url: ha.mywebsite.com
When you are finished your config should look something like:
Then it’s the moment of truth. Restart Home Assistant.
If everything worked as plan you should be able to visit ha.mywebsite.com and see your Home Assistant instance. From there it is just updating all your links and apps to use the new domain.
After that just following the instructions at https://www.home-assistant.io/components/cloudflare/ to enable the CloudFlare component if you would like.
I found this change super simple. The only issue I ran into was I got a little too excited and tried to move before the DNS changes had propagated resulting in some random host not found errors. But once the changes propagated everything was good.
If you are thinking about make the change from duckdns to Cloudflare it should be pretty simple and it comes with a lot of benefits including automatic renewal without having to open ports or use a script. If you want some more information about people that did the same change head over to the Home Assistant forum and search for Cloudflare. There are lots of good posts regarding this topic.
Until next time…Go Automate Something.